Generating Animated Game Sprites using GPT 5.4 + Image 1.5
Source: http://x.com/i/article/2031720286639333376
I recently posted
this tweet that showed how I created an animated pixel art pirate game character.
Since that tweet, I've gone ahead and improved the image generation.

GIF
Pirate game animated asset generated using GPT 5.4 and Image 1.5.
A lot of you showed interest (thanks!) - and even more had questions about the workflow I used. Rather than using threads, I thought I'd give X articles a try to showcase what I'm doing to get
Disclaimer:
This workflow is still *experimental* i.e. I am still figuring out the best way to get good results. So treat it as an educational resource, but it's not meant to be a definitive guide in any way.
Let's go!
Workflow Overview
The core idea is simple:
- start from one approved in-game frame
- ask GPT Image to create a whole animation strip around that frame
- normalize the strip into fixed-size game frames
- rebuild the asset index and preview it in-engine
1. Start From A Shipped Seed Frame
We learned that consistency gets much better when the model is anchored to the actual production sprite, not a loose concept.
For the hurt animation, the seed image was the following generated frame (I'll write a separate tutorial on how I got this first image) but
does cover the high level approach)

idle/frame-01.png
That matters because it locks in:
- the face
- the body proportions
- the palette
- the silhouette
2. Build A Reference Canvas For The Edit API
We do not send the raw 64x64 sprite directly. We upscale it with nearest-neighbor and place it into a larger transparent edit canvas with reserved frame slots.
For the hurt run, taking the above idle/frame-01.png and putting it into a 1024x1024 canvas, we get the following:

A 1024x1024 'edit' canvas gives enough room for multi-frame animations
That canvas is created with a python script.
3. Ask For The Full Strip, Not Tiny Frame Edits
One thing to note is that trying to generate animations frame-by-frame did not work well for character consistency. Instead the better method is to ask for one whole strip at once.
So for the hurt animation, I used the prompt:
Intended use: candidate production spritesheet for a 2D side-view pirate platformer hurt animation review. Edit the provided transparent reference-canvas image into a single horizontal four-frame hurt spritesheet. The existing sprite in the leftmost slot is the exact shipped idle-v2 starting frame and must remain the starting frame for this sequence: same compact pirate hero, same right-facing side view, same red bandana, same blue tunic, same brown boots, same tan skin, same readable face, same proportions, same pixel-art silhouette family. Composition: keep the image transparent, keep exactly one row of four equal 256x256 frame slots laid out left to right across the 1024x1024 canvas, centered vertically, no overlap between frame slots, no extra characters, no labels, no UI. Action: frame 1 stays as the calm idle starting pose, frames 2 through 4 show a short hurt reaction from a hit, with the same pirate recoiling backward, torso pulled back, head jolted, one brief pain expression, then slight recovery. Keep body size, head size, and outfit proportions consistent across all four frames. Style: authentic 16-bit pixel art, crisp pixel clusters, stepped shading, restrained palette, production game asset, not concept art. Constraints: no sword, no weapon, no scenery, no floor, no glow, no atmospheric haze, no impact effects, no shadows outside the sprite contours, no collage, no poster layout, no blurry details. Keep wide transparent empty space outside the four frame slots.
This gave a consistent sequence as you can see below:

Raw Image 1.5 output. The character has good consistency, but the per frame sizes differ.
4. Normalize The Strip Into Real Game Frames
The raw GPT strip is not yet game-ready. We import it into standardised format with 64x64 frames with another python script. Basically, what it does is
- detecting the sprite components in the raw strip
- using the player 'anchor' image (idle/frame-01.png)
- computing one shared scale for the whole animation
- padding each frame into a 64x64 transparent canvas
- optionally locking frame 01 to the exact shipped idle frame
That last part is important for hurt. We explicitly replace exported 01.png with the real idle frame so the animation starts from the exact sprite already used in-game.
This results is 'normalised' spritesheets having a standard frame size for each panel.

The 'normalised' Python output: each frame is now 64x64 and padded with transparency.
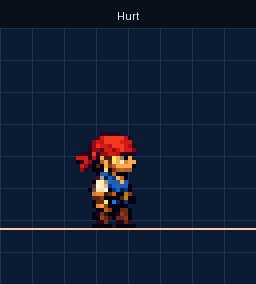
GIF
This works surprisingly well even for more complex animations. For example, see the Attack animation below

Image 1.5 Raw Output

Normalised spritesheet output
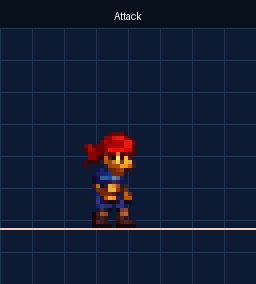
GIF
5. Lessons 5.1 Handling complex poses
Problems can come when one pose was taller than another. For example:
- a sword-up attack frame is naturally taller than a neutral frame
- if you scale that pose down on its own, the whole character looks smaller

The third frame did not correctly account for the pirate's height - so it 'squashed' the whole image down wrongly.
The fix was:
- use one global scale for the whole strip
- let pose differences show up as extra height inside the frame
- use padding and a shared anchor instead of per-frame rescaling
In Summary
If we want consistent AI-generated sprite animations, the workflow should be:
- pick the exact shipped sprite frame to anchor from
- generate a full strip in one request
- normalize with one shared scale
- lock frame 01 back to the shipped sprite when the animation should start from idle
- verify in the preview scene before treating it as production-ready
That is the part that has made the results noticeably more stable.